If you enjoyed making my paper Neolithic House model then you may also like this Roman Villa, which is available from my shop for a very small number of beans.

If you enjoyed making my paper Neolithic House model then you may also like this Roman Villa, which is available from my shop for a very small number of beans.
A little decoration for the local art shop door. I cut the shapes out of window cling using a Cricut Air. The Open/Shut sign is cut out of MDF and painted with acrylics.


I have plans for the main window, which I will show you when done.

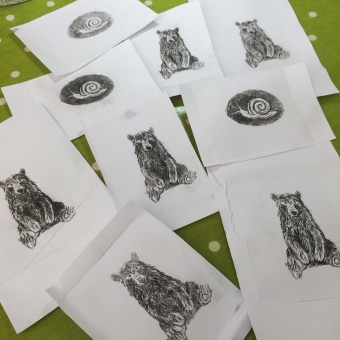
Bears love books and here are some bears enjoying reading.
They are free to print out and use. Click HERE to download the PDF.

Enjoy your Bears, but remember they are for personal use only and you may not sell them either in digital or printed form. You are welcome to print them out and give them away.
Jools x
A quick round up of needle felt characters I made last winter, as I’ve taken them off my portfolio page.


These are all sold, but I’ll be making more this winter.
(Sorry I don’t take commissions for needle felting and I’m unable to reserve any items.)
I love prints as an art form, but apart from some basic lino printing and screen printing I haven’t done any myself. Print making seems a bit of a daunting thing to try, requiring expensive equipment and space. I’ve always particularly wanted to try dry point etching, so I got really excited when I saw an artist on Twitter talking about PRINTING AN ETCHING WITH A PASTA MACHINE! Gosh.
Naturally I rushed out to buy one. Luckily my local cookshop had a modest one on sale and I got some sheets of flexible clear plastic from a nearby model shop.
This is what I did:

The plastic sheets I bought were A4, so I cut them up so that they were small enough to feed through the pasta machine. They don’t need to be clear, but it’s handy if you want to trace over a drawing. I scratched my design with a pointed implement I found in an old box of tools. I’ve no idea what it’s really for. Any pointed tool you can comfortably hold should work.

I used block printing ink as it was available. It worked fine. I’m going to try printing with acrylic paint with a drying retardant mixed in. I found the best way to ink the design was to rub the ink into the scratches with a cloth, then rubbing of the excess with a dry cloth.
 I printed onto cartridge paper, as I had some. Soak it in water for a few minutes first and pat dry. You’ll need to experiment with how wet the paper needs to be. Put the paper onto another piece of paper and some felt and place the inked plate face down on your paper. Fold the other side over. Be careful to hold the plate and paper together as you feed it into your pasta roller.

Wind the handle! You’ll need to guide the bottom end so that it doesn’t catch on the bottom of the machine as it emerges.
This is what I made:
There are several demonstrations of this by artists on YouTube. Worth a visit.
I’m looking forward to experimenting and printing lots more 🙂
This week I’ve been drawing animals in jumpers…


…using pen, coloured pencil and watercolour pencil. I thought they would make fun brooches..
I’m going to use the images for prints and cards and a few other things. The brooches are available on my Etsy shop, BearsGetCrafty. Also, as they I enjoyed colouring them in so much, I thought I’d share the fun… Click here to download the colouring sheet.

How to make a screen print on fabric with very cheap materials.
 I’d been wanting to print tote bags to sell on my shop for a while. I looked at commercial printing but it was expensive and required having large quantities made, home screen printing with photograph emulsion sounded complicated and I rejected lino printing because I just hate cutting it. Luckily, I found several tutorials on the internet for different methods of screen printing. I experimented a little, and used various of the ideas I’d seen. This is how I did it.
You Will Need:
 First you need your design. I drew my unicycling bear very roughly on paper then scanned it, completed the design in photoshop and printed it out the size I wanted it on the bags. You can just draw the design to the size you want or find an image on the web.
Next I took my piece of voile and stapled it to my picture frame. It needs to be as taut as possible. Keep the staples to the back of the frame as it needs to sit perfectly flat on your fabric while you are printing.

I put my printed out design under my frame and traced it onto the voile with a ballpoint pen.
(I left some of the detail out as I was happy to add it later, but it’s up to you how much you want to trace. Paper under screen so you can see the drawing.)
The next stage is to start painting on your screen with a blocking agent. I used a 50/50 mixture of PVA glue and water. Simply put glue and water into a jam jar and shake thoroughly! I also added a drop of acrylic ink to mine so that it was easier to see where I had painted.
 The idea is to block out all the areas you wish to remain white. Prop up your frame so that it’s not touching anything underneath and start painting on the glue mix with a fine brush. Once you have painted round the outline and added the detail use a larger brush to block in the big white areas. Allow the glue to dry and then repeat with a second coat.
Allow to dry thoroughly.
 Printing!
I made a test print before I started printing on bags. If you find you have made a mistake you can gently rinse off the ink under the cold tap, allow to dry, add more glue and dry before printing again.
To print you will need to put something underneath your fabric. I have a vinyl tablecloth and I put a piece of mountboard inside the bags. A plastic bag should work fine, but whatever you use make sure it is flat and smooth. It’s also a good idea to iron your fabric before you print on it.
 Place you frame on the fabric where you want to print. Make sure the voile is in contact with the fabric. You can see in the photo that I weighed the top my frame down with a large stone. Dollop a large blob of the screen printing ink at the top of your image and drag in across the image towards you with an old credit card. If you haven’t put enough ink on, don’t worry, just add some more and keep going. (I also tried applying ink with a brush but it didn’t work as well as this method.)
 Once you have covered your image with ink you can carefully lift your frame off. Put your fabric aside until the print has dried thoroughly. If you want to print another, carry straight on, or carefully rinse the ink off of your frame to use again.
The ink I used needs to be fixed with heat. Cover the image with a tea towel and iron as hot as you can on both sides. (Check manufacturer’s instructions for  the ink you use.)
This sounds complicated but it was really fun to do!
 My Unicycling Bear tote bags are available to buy on my Etsy shop.
Download and make a hug in a box, then give it to someone who needs a hug.

You will need:
Cardboard or stiff paper for your computer printer
Glue (eg PVA)
Scissors
Instructions:
Click on the image below and download the PDF
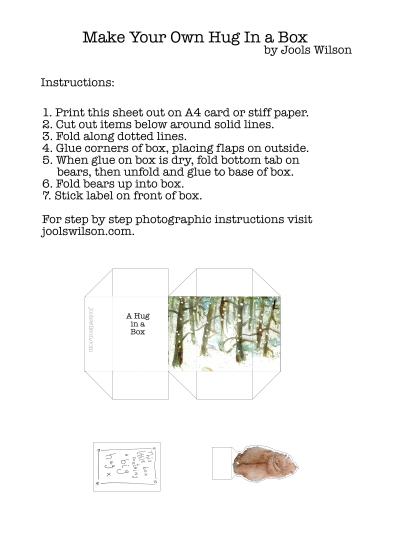
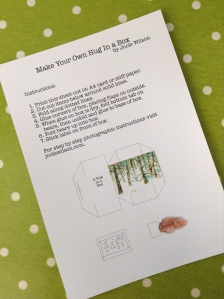
Print out the PDF file onto card or stiff paper.
Cut out the 3 images at the bottom of the page.
 Carefully cut the tabs as far as the image.

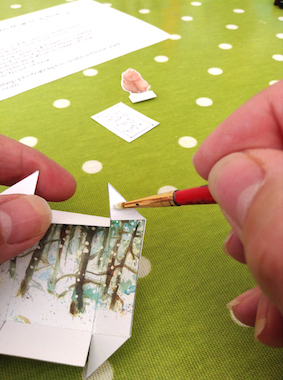
Fold the box along all the dotted lines. It will help if you gently score the fold lines first.


One at a time, apply glue sparingly to corner tabs and glue to outside of box. Hold each corner in place until dry.
.


Score base foldline on bears and unfold again. Apply glue sparingly to base.


Stick bears into base of box pressing down firmly. Hold until dry. When the glue is dry, fold bears up into box.

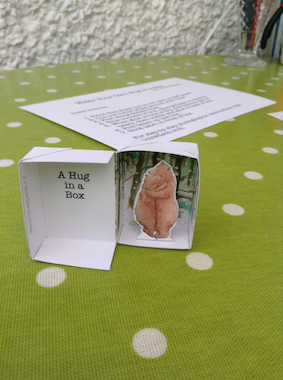
Stick the label on the front of the box.
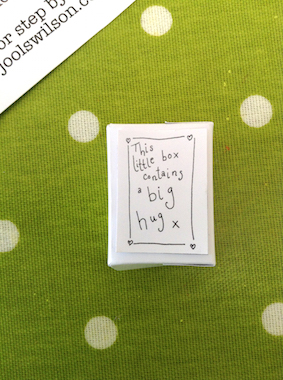
You’ve made a hug in a box!
