I love prints as an art form, but apart from some basic lino printing and screen printing I haven’t done any myself. Print making seems a bit of a daunting thing to try, requiring expensive equipment and space. I’ve always particularly wanted to try dry point etching, so I got really excited when I saw an artist on Twitter talking about PRINTING AN ETCHING WITH A PASTA MACHINE! Gosh.
Naturally I rushed out to buy one. Luckily my local cookshop had a modest one on sale and I got some sheets of flexible clear plastic from a nearby model shop.
This is what I did:

The plastic sheets I bought were A4, so I cut them up so that they were small enough to feed through the pasta machine. They don’t need to be clear, but it’s handy if you want to trace over a drawing. I scratched my design with a pointed implement I found in an old box of tools. I’ve no idea what it’s really for. Any pointed tool you can comfortably hold should work.

I used block printing ink as it was available. It worked fine. I’m going to try printing with acrylic paint with a drying retardant mixed in. I found the best way to ink the design was to rub the ink into the scratches with a cloth, then rubbing of the excess with a dry cloth.
 I printed onto cartridge paper, as I had some. Soak it in water for a few minutes first and pat dry. You’ll need to experiment with how wet the paper needs to be. Put the paper onto another piece of paper and some felt and place the inked plate face down on your paper. Fold the other side over. Be careful to hold the plate and paper together as you feed it into your pasta roller.

Wind the handle! You’ll need to guide the bottom end so that it doesn’t catch on the bottom of the machine as it emerges.
This is what I made:

There are several demonstrations of this by artists on YouTube. Worth a visit.
I’m looking forward to experimenting and printing lots more 🙂


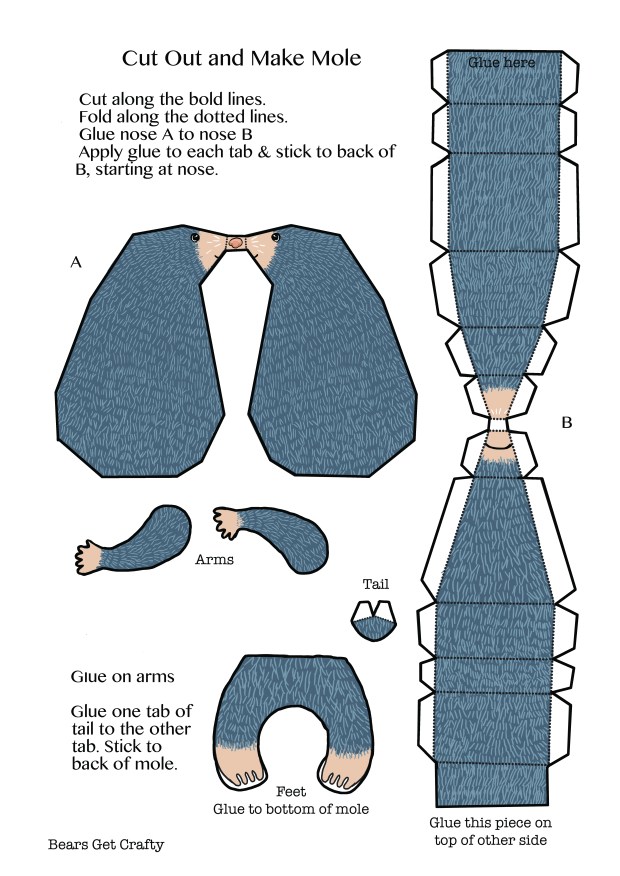
 You will need: Scissor, different types of paper, glue, pencil, pen, paint.
 Cut out tail fin shapes from a different colour paper or tissue paper.
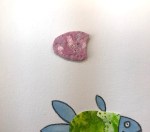


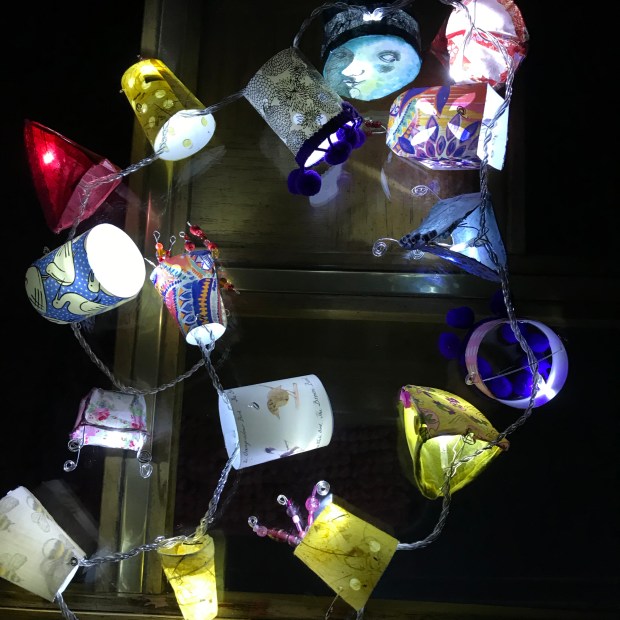
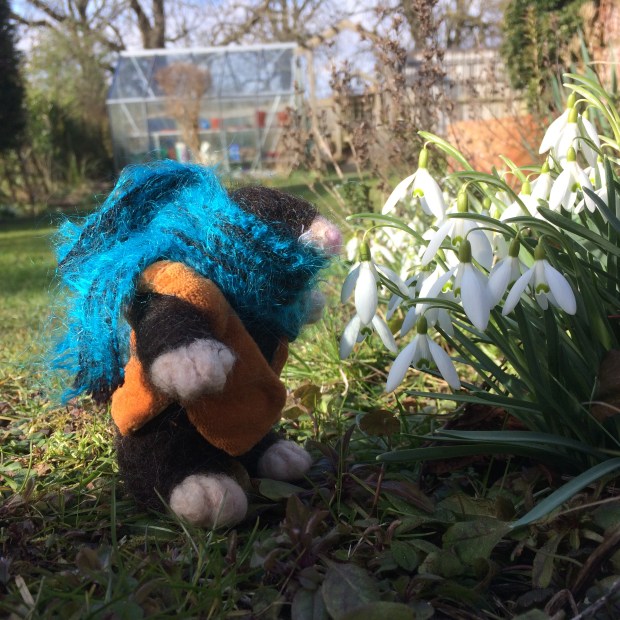
 I have to admit this craft project came about after I saw some lovely fairy lights by artist